The Cobra knot, also known as the Solomon bar, is a fundamental and versatile knot in macrame. It creates a thick, durable braid that’s perfect for bracelets, keychains, and more. This guide will walk you through the steps to create a basic Cobra knot bracelet using two colors for a visually appealing finish.

What You’ll Need:
- Two colors of cord (we’ll use red and blue). You’ll need one longer piece of each color.
- Scissors
- A buckle or other type of closure for your bracelet.
- A macrame board or a secure way to hold your starting loop (e.g., a safety pin and your pants).
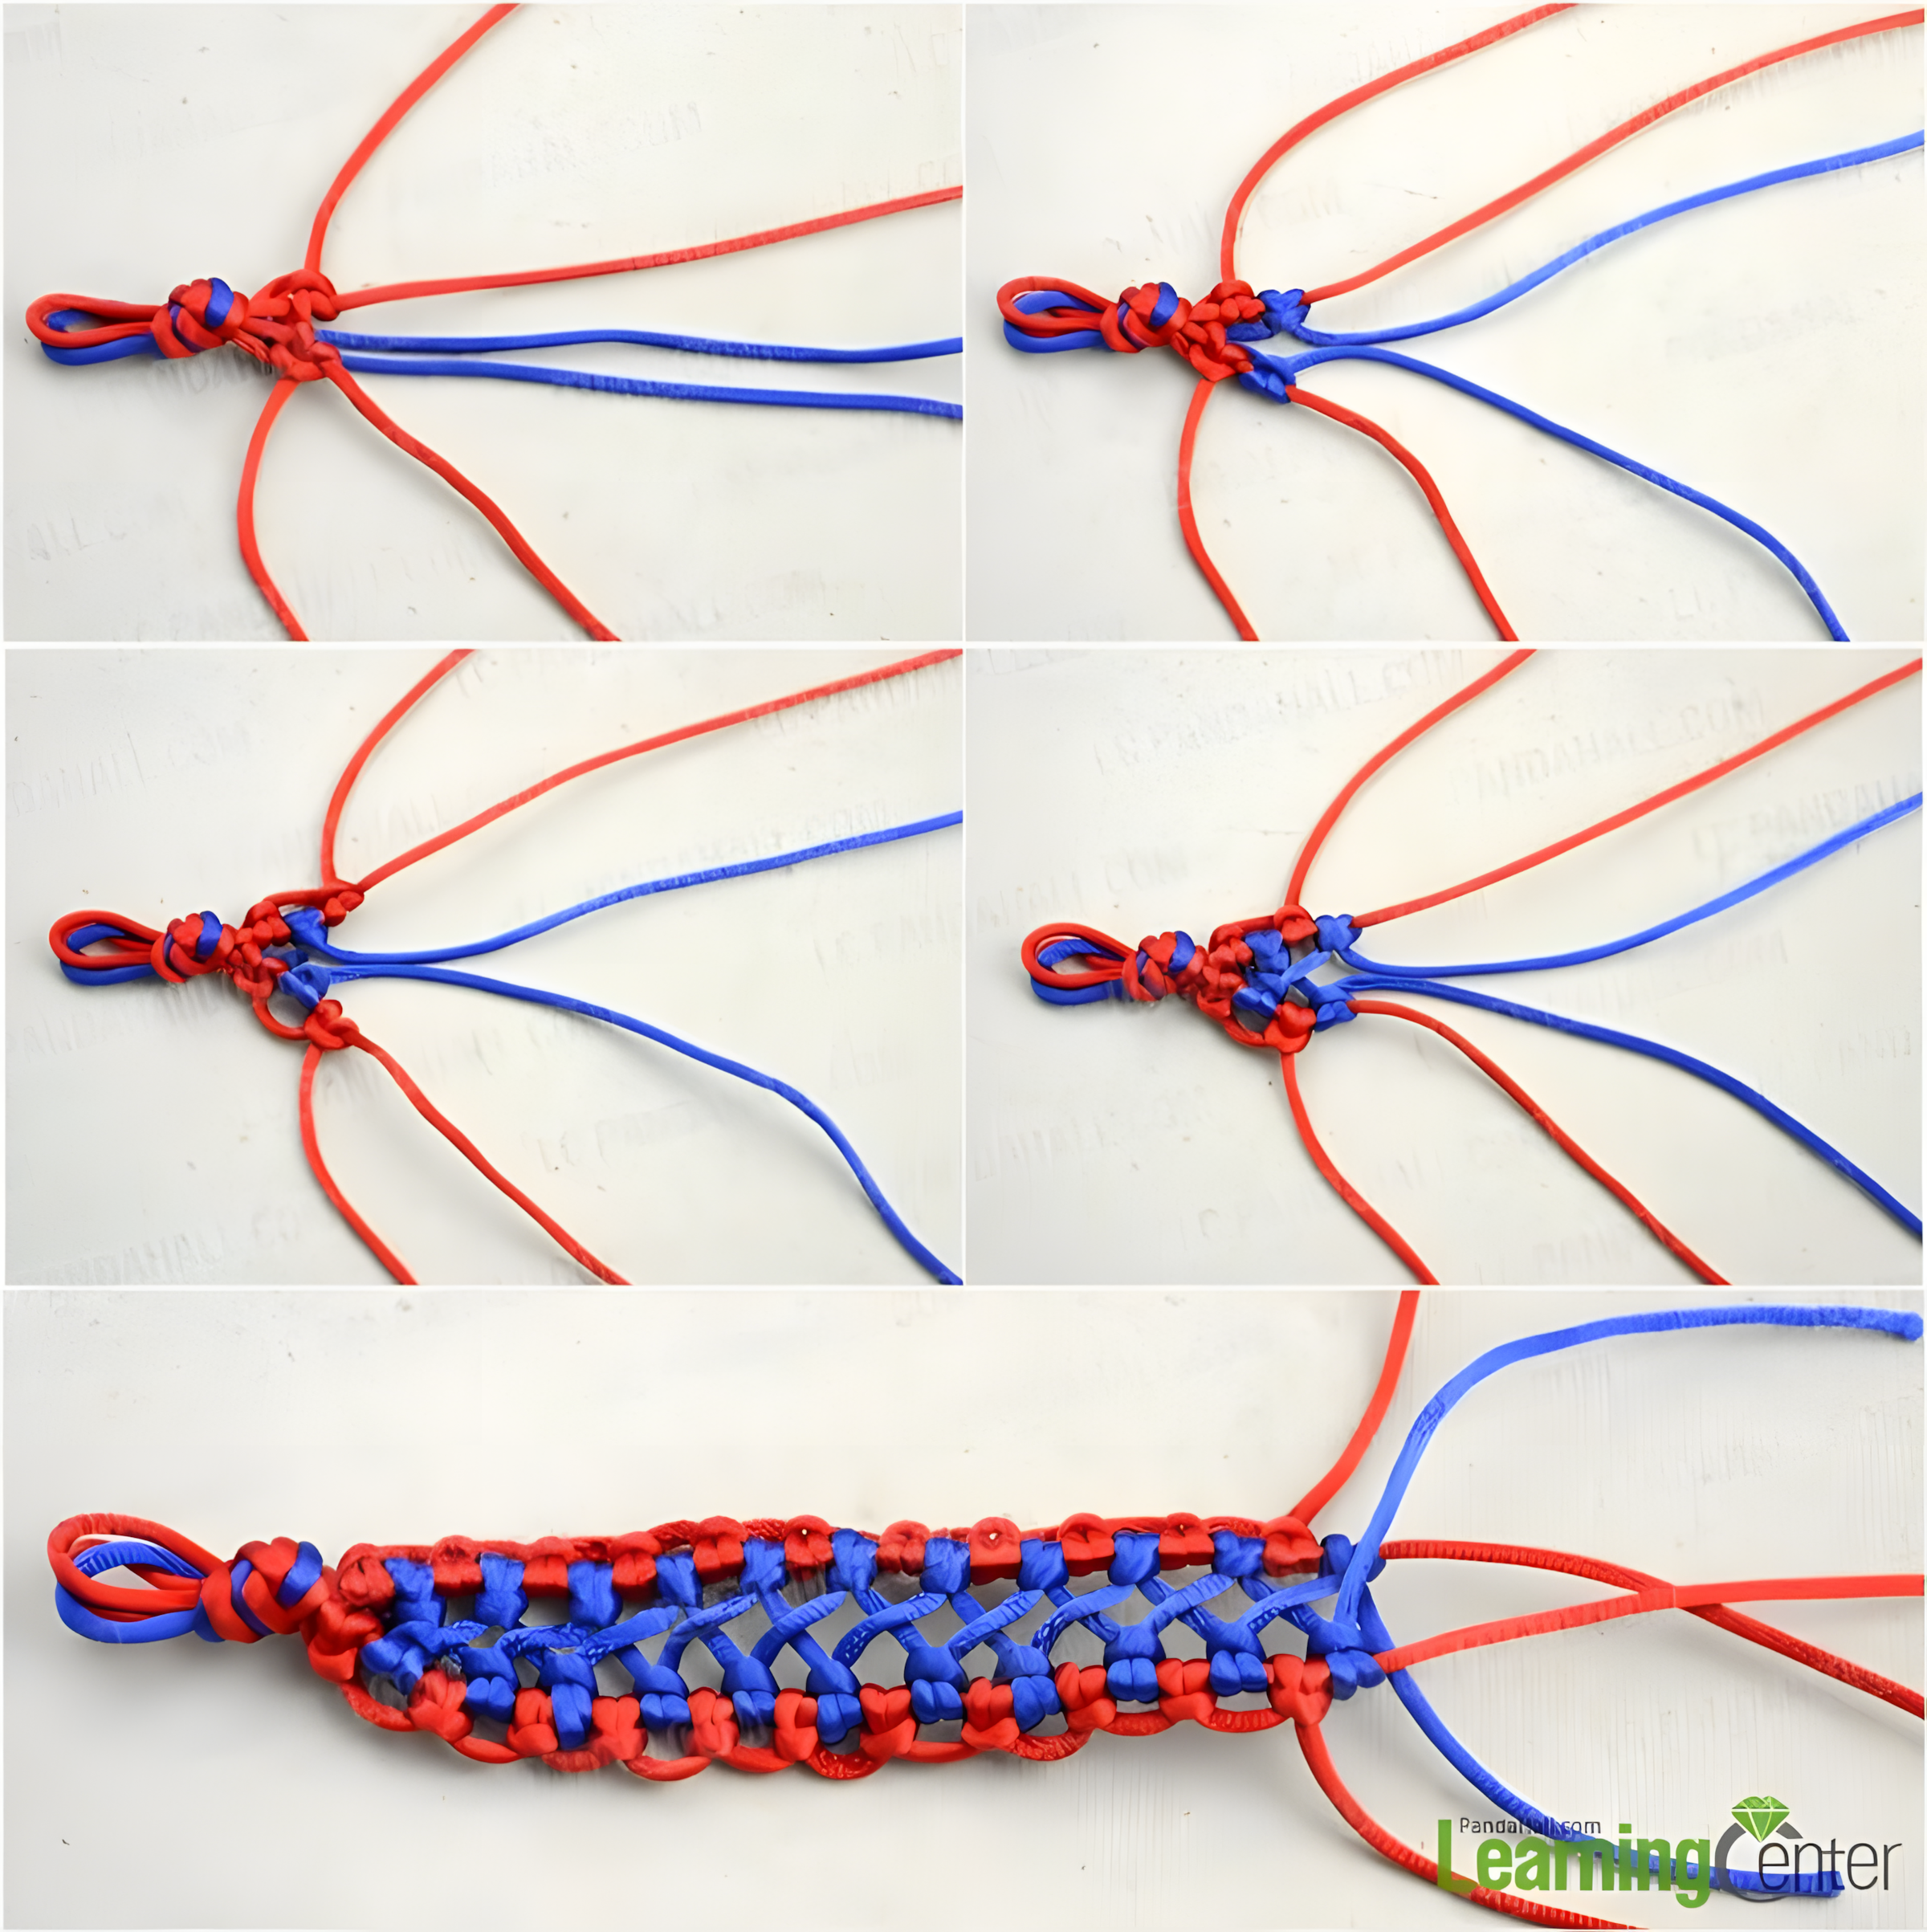
Step 1: Setting Up Your Cords (Top Left Image)
- Fold both your red and blue cords in half.
- If using a buckle, thread the folded ends of both cords through one side of the buckle. Bring the loose ends through the loops of the folded ends and pull to secure them to the buckle.
- Arrange your cords so you have two red strands in the middle and one blue strand on each side. The middle red strands will be your core strands, and the outer blue strands will be your knotting cords.
Step 2: The First Right-Hand Cobra Knot (Top Left Image – Detail)
- Take the right blue strand and bring it over the two middle red strands and under the left blue strand.
- Take the left blue strand and bring it under the two middle red strands and up through the loop created by the right blue strand.
- Pull both blue strands firmly but evenly to tighten the knot. This completes the first Cobra knot. Notice how the blue knot sits on top.
Step 3: The First Left-Hand Cobra Knot (Top Right Image)
- Now, for the next knot, we’ll start from the left. Take the left blue strand and bring it over the two middle red strands and under the right blue strand.
- Take the right blue strand and bring it under the two middle red strands and up through the loop created by the left blue strand.
- Pull both blue strands firmly and evenly to tighten this knot. You’ll see that this blue knot now sits next to the previous one, creating the braid pattern.
Step 4: Continuing the Pattern (Middle Left and Middle Right Images)
- Continue alternating between right-hand and left-hand Cobra knots.
- For a right-hand knot, the right outer cord goes over the middle and under the left.
- For a left-hand knot, the left outer cord goes over the middle and under the right.
- Always remember to bring the other outer cord under the middle strands and through the loop created by the first outer cord.
- Keep your knots consistent in tightness to create an even braid.
Step 5: Building the Bracelet Length (Bottom Image)
- Continue making Cobra knots, alternating sides, until your bracelet reaches your desired length to fit comfortably around your wrist.
- Periodically check the length against your wrist.
Step 6: Finishing the Bracelet (Bottom Image – Opposite End)
- Once you’ve reached the desired length, thread all four strands through the other side of your buckle.
- Pull the strands through and then tie a secure knot with all four strands together close to the buckle.
- Trim any excess cord, leaving a neat finish. You can singe the ends of synthetic cords with a lighter to prevent fraying (adult supervision required).
Step 7: Enjoy Your Cobra Knot Bracelet!
You’ve now successfully created a sturdy and stylish Cobra knot bracelet! The alternating colors create a cool textured look. This technique can be used for a wide variety of projects, so feel free to experiment with different cord types and colors for your next macrame adventure! Happy knotting!

