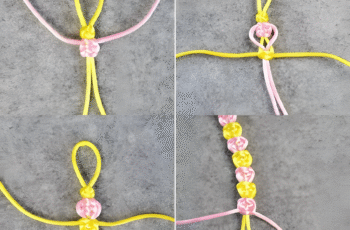
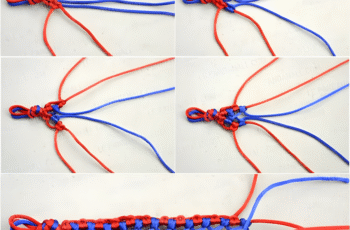
Looking for a simple yet stylish accessory? These two-tone knotted bracelets are incredibly easy to make, perfect for beginners, and add a pop of color to any outfit. Whether you’re crafting with friends or looking for a quick DIY project, these bracelets are a fun and rewarding experience.
What You’ll Need:
- Embroidery Floss or Cord: Two contrasting colors. (e.g., pink and white, blue and yellow)
- Scissors
- Tape or a Safety Pin: To secure your bracelet while you work.
Getting Started
- Cut the Floss: Cut 3 strands of each color of floss. They should be approximately 36 inches long. You can always trim extra later.
- Gather Strands: Bring all 6 strands together and fold the bundle of 6 in half to create a loop at the top.
- Secure the Loop: Tie a simple overhand knot close to the fold, creating a small loop at the top. This loop will be used to fasten the bracelet.
- Secure Your Work: Tape the knotted loop to a flat surface or use a safety pin to secure it to your pants.
Creating the Knots
- Separate Strands: Divide the strands into two groups: one color on the left, and the other color on the right. Each group will have 3 strands.
- First Knot: Take the left group of strings and make a backwards knot on the right set of strings. To do this, make a backwards number 4 shape with the strings on the left, and pull to tighten.
- Second Knot: Take the right group of strings and make a forwards knot on the left set of strings. To do this, make a forwards number 4 shape with the strings on the right, and pull to tighten.
- Continue Knotting: Alternate steps 2 and 3 to create the braided appearance.
Finishing the Bracelet
- Determine Length: Continue knotting until the bracelet reaches your desired length. Wrap it around your wrist to ensure it fits comfortably.
- Final Knot: Once you’ve reached the desired length, tie another overhand knot to secure the end of the bracelet.
- Trim the Ends: Trim the excess floss, leaving a few inches of string for tying the bracelet closed. You can trim them evenly or leave them slightly staggered.
- Tie it On! Slip the tails of the end through the loop on the top to wear the bracelet.
Tips for Success
- Keep Tension Consistent: Maintaining even tension as you knot will result in a more uniform and aesthetically pleasing bracelet.
- Experiment with Colors: Try different color combinations to create bracelets that reflect your personal style.
- Add Beads (Optional): For a more personalized touch, you can add small beads to the bracelet. String the beads onto the floss before knotting and incorporate them into the design as you go.
- Adjust the Thickness: You can adjust the thickness of the bracelet by using more or fewer strands of floss.
This simple knotted bracelet is a quick and rewarding craft project that’s perfect for making friendship bracelets, gifts, or just a fun accessory for yourself. So, grab your floss, follow these easy steps, and create a stylish knotted bracelet in no time!

